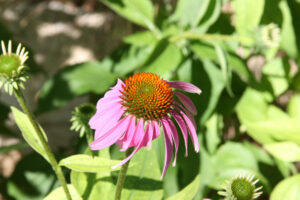
Several years ago someone showed me a an interesting app they had on their phone. The results were interesting but not enough to get me to invest in an iphone. I love my Pixel and and the camera and would never settle for an iphone just to get an app. Anything that can be done to a photo can always be done better in GIMP so below are the instructions.
I’m using GIMP 2.10.20 which is the latest version at the time of this writing. I tried to write this very generic so that if your version is different you can still follow along.
1 – Make a copy of the original in the layer manager
You will need the original in a future step so be sure to do this. Making a copy is just something I always do in the layer manager. Not that bad things will happen to you but I seem to go blindly into the “cavern of no return” so having an exit strategy is always my first step.
2 – Go to Layer / Transparency – add alpha channel
Be sure you are on the new copied layer in the layers window. If you already have an alpha channel this will not be available and you can skip this step.
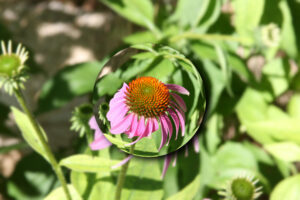
3 – Filters / Distorts – lens distortion
main & edge at 100%
zoom -3
Everything else on this filter panel you should be able to keep the same.
4 – Repeat step 3, 4 more times.
You will need to do this 5 times to get the proper effect.
5 – Use ellipse tool to select the image – you can select either a circle or an ellipse
I’ve obviously done this many times and I’ve discovered if your picture is square then a circle is often the right way to go. However, if you have a standard photo, either landscape or portrait, then an ellipse will often look better. It really depends on the subject of the photo and the orientation of the picture.
6- Go to Select Invert
You are going to get rid of everything outside of your selection so you are inverting the previous selection.
7 – Edit / Cut
Getting rid of everything outside of the selection.
8 – Copy this layer and call it Marble
9 – Copy Marble layer and create a layer mask – white full opacity, Call this Highlight
10 – Select the layer mask / flip the color to black and fill the outside of the marble with black
11 – Go to Select None
12 – Go to background and filters / blurr / goussian blurr = 20
13 – back to marble layer and make a shadow – use filter light & shadow / drop shadow / shadow parameters:
20 20 30 80
14 – duplicate layer with the marble and layer mask
make everything transparent
use gradient white to transparent and make the upper left white
15 – duplicate the above layer and switch to black
make the image all transparent
and do the lower right cornewr with the black
16 – change transparency of the above 2 layers
17 – Optional Filter / Light & Shadow / Supernova